Warning this is a picture heavy post…
Yesterday and today, after my daughter and me finished playing board games, I made some more bias tape. I must admit it’s a bit addictive.
Saturday Bias Tape adventures

Yesterday, the above fabric was turned into bias tape. Yes, I used the same fabric that I used on Friday, but this time I did it properly and cut the fabric on a 45 degree angle. I easily achieved this by making a triangle out of the fabric, see?

I then used my quilters ruler to mark off 2″ of fabric.

This was easily achieved since the ruler has slots that I could put the blade of my Gingher rotary cutter through to cut the fabric. My Gingher rotary cutter arrived today! Amazon now delivers on Sunday. I love this rotary cutter, it cuts through fabric like a hot knife through butter.

I proceeded to cut all the bias strips. I didn’t measure the strips after they were all sewn together, but the above fabric made several yards of bias tape.

The bias tape machine makes about 12 feet of bias tape in a minute. That’s fast for a domestic bias tape machine.

The above fabric took about five minutes to turn into bias tape.

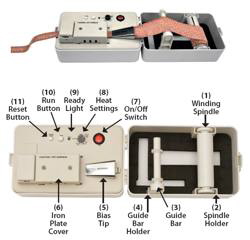
The Simplicity Bias tape machine makes the process of making bias tape, super easy!
I decided to turn this single sided bias tape into double sided bias tape. I pulled out my American Beauty iron, used the pressing cloth that I made, folded the tape in half and pressed again. I then wrapped the tape around thin cardboard, similar to how it’s wrapped at the fabric store, and put it aside. The results? Perfectly made bias tape that I created myself.
Sunday Bias Tape adventures

Here’s what I made today. See the above picture, isn’t that lovely?

Remember the above fabric? It’s the leftovers from the flannel pajamas that I sewed for my daughter.

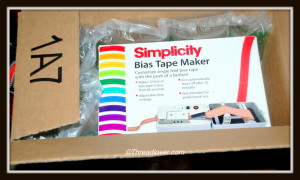
And here’s all the bias tape I’ve created thus far! That’s not bad at all. I received my bias tape machine less than two days ago. It arrived Friday evening.
I now have several yards of bias tape and I can’t wait to start using them on a variety of projects. My daughter said, “Mom, what are you going to do with all that bias tape?” I replied, “Oh, they will all find a home very soon!” I told her I wanted to get it out of the way, so that when I was ready to add trim I did not have to take time to make bias tape. But honestly, If I made it on the spot, that would not have been a big deal. This machine turns fabric strips into neat bias tape very quickly.
The sweet monkey fabric will be used to edge a robe that I’m making for my daughter. I’m hoping JoAnn’s has more of this fabric left, so I can make the robe. If they don’t, I’ll choose pink flannel fabric. This bias tape won’t be double sided since I think it will look much nicer as single bias tape. Also, you won’t be able to see the monkeys if I make it double sided.
What I notice about the Simplicity Bias Tape Machine
Pay attention to your seams
I’ve learned to pay close attention to where you sew the continuous bias strips. Make sure you feed those seamed edges into the machine properly or you could end up with some wonky bias tape. I think I’ll create a video to show how to do it correctly and what happens if you don’t.
Let the machine get hot
I’ve learned to wait about three minutes before feeding the fabric through the Simplicity Bias Tape machine. If you start too early, the fabric might not be pressed by the”iron”.
Sometimes you have to pull the bias tape through the end of the machine
If the fabric is too thick, you might have to guide the tape (gently) out of the machine.
I’m sure there will be other things that I discover as I continue to use the machine, but those are the ones that pop out at me. As I use the machine, I’ll be sure to post what I’ve learned, before long I’ll be able to post a thorough guide for the Simplicity Bias Tape machine. Yeah!
I’m loving this machine. My only regret is that I did not purchase it sooner. 😉
Accessories Needed:
- Fabric
- Ruler
- Scissors
- Simplicity Bias Tape Machine


